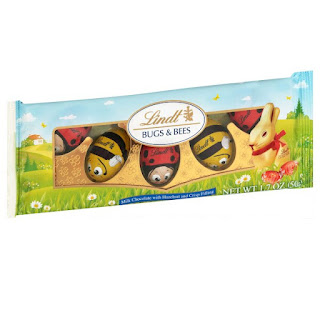
HAPPY SPRING!!! I was so excited when March 21st arrived. I'm ready for the warmer weather and all the beautiful flowers. With Easter around the corner, I love to wander the candy aisles at the grocery store and see what's new for the season. These Lindt Bugs 'n Bees chocolates are definitely a favorite.
With both bees and lady bugs in the pack, I decided to design a box for each type. The box is the same size but the DSP and embellishments are different.
Start with a piece of card stock cut at 5-1/2in by 7in. For the lady bug box, I used REAL RED and for the bee box, I used BUMBLEBEE. On the LONG SIDE, score at 1/2in, 3in, 3-3/4in, and 6-1/4in. On the SHORT side, score at 3/4in, 3-1/4in, and 4in. Below is a picture of the cardstock after the excess is cut away.
Next, before assembling the box, adhere the DSP to the box panels. For the lady bug box, I used a black and white stripe design from the PATTERN PARTY DSP. I used a BUMBLE BEE design from the SWEET SYMMETRY DSP for the bee box. Cut three pieces for each box, two at 2-3/8in by 2-3/8in and one at 2-3/8in by 1-3/8in. Remember to round the corners of the box flap and the small piece of DSP before adhering to the box. Use the TOMBOW to place adhesive on the smallest side flap and assemble the box.
For the embellishment, start with a 2in BASIC WHITE circle with a coordinating scallop (BASIC BLACK for the bee box, REAL RED for the lady bug box). Stamp the MY FRIEND sentiment to the right center of the circle using MEMENTO BLACK INK. For the bugs, punch the bug die cut out of BASIC BLACK card stock, using the LADY BUG PUNCH. For the bee body, punch out a second body in BUMBLEBEE card stock. Cut off the head then using the STAMPIN' TRIMMER, cut the body apart every 1/4in, making stripes for the bee. Attach alternating stripes to the body with TOMBOW.
For the bee, punch out the wings using a piece of vellum. For the lady bug, stamp the wings image on a scrap piece of BASIC WHITE using REAL RED INK. Then, using the dots image, fill in the polka dots on the wings using the MEMENTO BLACK INK. Punch the wings out. For lady bug, attach the wings with DIMENSIONALS, on the bee, use a GLUE DOT. Both bugs are attached to the circle using DIMENSIONALS.
Lastly, cut a 1in by 8 in piece of coordinating card stock for the belly band. Wrap it around the box to identify the places to fold then take a BONE FOLDER and crease them. Wrap the belly band so that the ends are on the front. Adhere using TOMBOW. Attach the die cut to the belly band with DIMENSIONALS, making sure to center it on the box.
The video below shows how the box comes together.
If you'd like a PDF with directions, click below
All the products used for this project are available in my online store. Click below and get shopping.
Hope you enjoyed the HELLOW LADYBUG BUNDLE project. Come back soon. I have another fun project using this bundle. Thanks for dropping by.
Keep Stamping,
Barb Reed
The Wexford Stamper


No comments:
Post a Comment