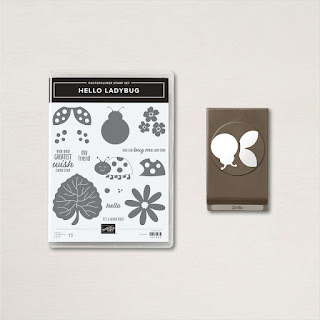
My love for the LADYBUG BUNDLE has no bounds. I had so much fun creating projects using this bundle and I'm excited about my latest mini gift bag. It's a perfect size for some Easter goodies. Here is what the bundle includes:
Start with a piece of DSP cut at 4-1/2in by 9-1/2in. For the sample above, I used paper from the HEART & HOME Designer Series Paper pack and for the video tutorial I used a piece from the HAND PENNED DSP. Anything in your stash that is a floral will be perfect for this project. Starting on the SHORT SIDE, score at 1-1/2in.
Turn your paper so that the score line you just made is close to the top of your scoring board. Then on the LONG SIDE, score JUST TO THE SCORE LINE, at 1-1/2in, 4-1/2in, 6in, then across the entire with of the paper at 9in. Fold on the score lines and snip all the short score lines up to the horizontal score line to create the tabs for the bottom of the gift bag.
Place TEAR N TAPE on the thin vertical panel and adhere it to the other side of the panel. Then using TOMBOW fold up and adhere the rectangular and square tabs to create the bottom. Cut two strips of coordinating card stock at 5-1/2in by 1/2in for the handles and adhere them to the top of the bag as shown using TEAR N TAPE.
For the flower, punch eight petals using the LADYBUG PUNCH. Choose a card stock color that coordinates with your DSP. Place one of the CRUMB CAKE 1-3/8in CIRCLES in front of you and start creating the flower by adhering petals in a circle, overlapping as you go. I used GLUE DOTS so I could move the petals around to get the best result. Once you have finished arranging the petals, place the second CRUMB CAKE circle on top for the center.
Next, using the LADYBUG PUNCH, punch out a ladybug body using BASIC BLACK card stock. On a piece of BASIC WHITE card stock, stamp the wings using a coordinating ink color and punch them out. Adhere the wings to the body using DIMENSIONALS then to the bag using DIMENSIONALS.
The link below is a video tutorial that shows how the project comes together.
Click the link below for a downloadable PDF tutorial
All the products used in this project are available in my online store. Click below and get shopping.
Thanks for stopping by my blog. I hope you feel inspired to be creative yourself. Come back soon for some more great project ideas.
Keep Stamping,
Barb Reed
The Wexford Stamper


No comments:
Post a Comment