After a nice restful Easter break, this stamper is ready to get back to creating. This project I originally made for my team meeting but they were so excited with the project, they asked me to do a video tutorial. What's great about this tutorial, I will walk you through how to make this treat holder no matter what size your large chocolate bar may be.
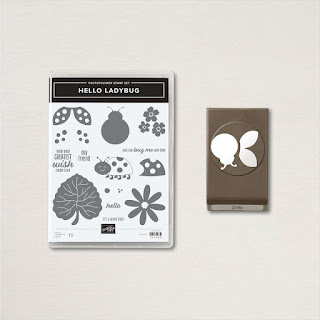
For the treat holder above, I used the LADYBUG BUNDLE and paper from the PATTERN PARTY DSP but this project can be created using any paper and stamps you have in your stash.
I went through my stash and created these alternatives.
Before cutting your DSP, measure your candy bar.
For my example, the length of the bar was 6 inches. I added 1-1/2in to the total and determined that the length of my DSP should be 7-1/2in. The height of the bar is 3 inches. I add 1/4in to that number, then double that number and add 2in so the height of my DSP is 8-1/2in. So for my candy bar, I will use a piece of DSP measuring 7-1/2in by 8-1/2in.
On the 7-1/2in side, score at 1/2in from each side. On the 8-1/2in side, score at 3-1/4in and 6-1/2in. Next, create the two cardstock panels that form the concertina folds. The width of the panel will ALWAYS be 2in and the height of the panel is the height of your candy bar. In my case, 3in. Now on the 2in side, score at 1/2in, 1in and 1-1/2in. Fold and crease on those score lines.
Fold the 1/2in scores inward, with the outside face down. Adhere the folded card stock panels with the edges on the DSP folds on both sides. Fold up the DSP to form the holder and adhere the other side of the folded panel the same way to the upper part of the DSP. It's best to use liquid adhesive like TOMBOW for this.
Before folding over the top flap, use a corner rounder on the corners if desired. Next, use a piece of cardstock measuring 2-1/2 by 8-1/2 for the belly band. Lay the strip behind the treat holder with the candy inside making sure there is an equal amount of the strip above and below the holder. Use your bone folder and score the strip just below the holder. Fold up the bottom of the strip and fold around the top. Using TEAR N TAPE, adhere the strip so it fits snuggly around the candy bar.
For the embellishment, I used a 2-3/8in circle with a coordinating scallop. Layer them together and adhere them with DIMENSIONALS over the folded strip in the front. Now its time to decorate. For my lady bug treat holder, I stamped the leaf image in SHADED SPRUCE ink and fussy cut it out. I then punched out the lady bug body using BASIC BLACK card stock. The wings were created using REAL RED ink on BASIC WHITE card stock, punched out using the LADY BUG PUNCH. I layered all three pieces on the circle, placing the wings using DIMENSIONALS. I added a silver thread bow with a GLUE DOT.
The video below shows how the candy bar holder came together.
If you'd like a PDF tutorial for this project, click below.
All the products I used for this project are available in my online store. Click below and SHOP.
Thanks so much for dropping by my blog. I'm excited for the new ANNUAL CATALOG with will go live in May. Come back and see projects from that amazing catty.
Barb Reed
The Wexford Stamper


No comments:
Post a Comment