
Here are some of the products I'll be using. All of them are available in my online store.
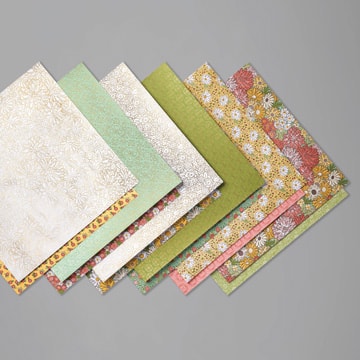 |
| ORNATE GARDEN SPECIALTY DESIGNER SERIES PAPER |
 |
| ORNATE LAYERS DIES |
 |
| ORNATE THANKS STAMP SET |
The projects for this blog post are a Hand Cream Box and a Thank You Card

Hand Cream Box Instructions
Start with OLD OLIVE CARD STOCK cut at 6-3/4in by 7-1/2in. Score on the short side at 1in from both ends. Then score on the long side at 1in, 3in, 4in, 6in and 7in. Watch the YouTube video below to see how the box comes together.
Cut five panels using the ORNATE GARDEN SPECIALTY PAPER. 4-1/2in by 1-3/4in (1 panel), 4-1/2in by 3/4in (2 panels), 1-3/4in by 3/4in (2panels) Adhere them to the sides of the box.
Using on stitched rectangle from the ORNATE LAYERS DIES, stamp the sentiments using OLD OLIVE and MEMENTO inks as shown in the picture.
Cut out three daisies using the MEDIUM DAISY PUNCH and SO SAFFRON CARD STOCK. Stack them and adhere together using TOMBOW LIQUID ADHESIVE. The center is made using the 1/2in CIRCLE PUNCH and a scrap of EARLY ESPRESSO CARD STOCK.
My second project is a Thank You Card.

Thank you card instructions
I started with a piece of ROCOCO ROSE CARD STOCK cut at 5-1/2in by 8-1/2in and scored at 4-1/4in for the card base.
For the front panel, use another piece of ROCOCO ROSE CARD STOCK cut at 4in by 5-1/4in with a piece of ORNATE GARDEN DSP cut at 3-3/4in by 5in on top.
For embellishments, use one WHISPER WHITE stitched rectangle for the ORNATE LAYERS DIES. One the rectangle, stamp the sentiment in ROCOCO ROSE and MEMENTO inks.
Cut two 1in by 5in strips of card stock, one using ROCOCO ROSE and the other using BLUSHING BRIDE CARD STOCK. Use the FILAGREE DIE from the ORNATE LAYERS DIES to cut out the ROCOCO ROSE strip. Adhere the strips to each other then to the front of the card.
Below is a YouTube video showing how both of these projects came together.
If you have any questions about this or any project on my blog, please don't hesitate to email me (blreed@comcast.net) or message me. If you are interested in any of the products shown in my projects, you can go to my online store to purchase them. Just click below.
Thanks again and Keep Stamping,
Barb Reed
The Wexford Stamper
1.

No comments:
Post a Comment