Showing posts with label 2022 July-Dec Mini Catalog. Show all posts

Wednesday, December 21, 2022

MAKE A SANTA'S MAILBOX TREAT BOX USING THE HANDMADE WISHES BUNDLE


Christmas is around the corner.  I have one more treat box project to share with you.  The SANTA MAILBOX is a great treat box.  It has a magnetic closure and can hold lots of holiday goodies.  It's easy to make and will make any friend or family member smile.

You can really use any holiday Designer Series Paper to make this box.  I used the SWEETEST CHRISTMAS DSP. I also used the HANDMADE WISHES BUNDLE for the embellishment on the front of the box.  Lastly, I used PLAYFUL ALPHABET DIES to put MAIL on the back portion of the treat box.

Start with a piece of REAL RED card stock measuring 8in by 11in.  On the SHORT SIDE, score at 1-1/2in, 6-1/2in.  On the LONG SIDE, score at 3-1/2in, 5in, 8-1/2in and 10in. After creasing the score lines and cutting away the excess card stock, it will look like the template below.


Place TOMBOW on the box flaps and put the treat box together. Add the extra flap panel to the front of the 1in wide flap on the box.  Before adhering, I used the BORDER DIES and cut a pointed edge to the front flap.    If you are making a magnetic closure for the box, place a magnet on the outside of the front flap using a GLUE DOT then cover it with a DSP panel measuring 4-3/4in by 2in and cut using the same BORDER DIE.  Place a second magnet under the flap with a GLUE DOT on it and gently close the flap, allowing the magnet to stick to the front of the box.  Open and press down with your fingers then adhere the DSP panel on the front side. These panels should measure 4-3/4in by 3-1/4in for the front and 1-3/4in by 4-3/4in for the top. Now place TOMBOW on the tabs and put the box 

For the large back panel that you will adhere the treat box to, you will need a piece of REAL RED card stock measuring 6in by 5-1/2in and a DSP panel measuring 5-3/4in by 5-1/4in.  Again, I used the BORDER DIES to round the top of both the panel and DSP before adhering them together and adhering the treat box. To complete the project I used the PLAYFUL ALPHABET DIES to spell out MAIL and adhere them to the top. Click on the link below to the YOUTUBE video to see how the box comes together.


If you'd like a PDF for this project, just click below.


All the products used in this project are available in my online store, some of them are on clearance.  Check it out.


This is my last post for 2022.  I hope you found creative inspiration and made some fun projects yourself.  Don't forget to check back in January when I share all the amazing new products in the JAN-APRIL 2023 MINI CATALOG and SALE A BRATION.  

Keep on Stamping,

Barb Reed
The Wexford Stamper


Wednesday, November 16, 2022

LET'S CREATE FOR CHRISTMAS- WEEK 1 SNOWFLAKE BROWNIE TREAT BOX


Christmas is on it's well.  This time of year is my favorite time to create gifts for friends and family.  For WEEK #1, I created this cute little treat box, the SNOWFLAKE BROWNIE TREAT BOX.  I used these yummy Little Debbie treats, available at any grocery store.

I used products from the beautiful LIGHTS AGLOW SUITE.  I used the snowflake die from the CHRISTMAS LIGHTS BUNDLE and the sentiment from the  BRIGHTEST GLOW stamp set


For DSP, I used the GARDEN GINGHAM paper pack, the same paper I used for my HALLOWEEN PROJECTS.  This pack is so versatile, I'm sure I'll be using it for SPRING PROJECTS as well.


For the treat box, start with a piece of MINT MACARON card stock measuring 6-1/8in by 6-3/8in.  On the LONG SIDE, score at 5/8in, 2-7/8in, 3-1/2in and 5-3/4in.  On the SHORT SIDE, score at 5/8in, 4-7/8in and 5-1/2in.  Below is a template of the box after the scored lines are creased and the excess paper is cut away.


Before assembling the box, place the two DSP panels measuring 4-1/8in by 2-1/8in and adhere them using TOMBOW.  

To decorate the box die cut a snowflake using WHITE GLIMMER PAPER.  Add it to the top of the box using DIMENSIONALS.  Stamp the sentiment on a scrap of MINT MACARON and punch it out using the 1-3/8in CIRCLE PUNCH. Place it on top of the snowflake using DIMENSIONALS.  Finally, I added a few pearls from the FESTIVE PEARLS PACK.

Below is a YOUTUBE video that shows how the box comes together.


If you'd like a downloadable PDF for this project, click below.


All the products used for this treat box are available in my online store.  Just click below.


Thanks again for stopping by my blog.  Come back soon.  I've got lots of holiday projects left to share.


Keep Stampin,

Barb Reed
The Wexford Stamper


Wednesday, October 26, 2022

MAKE A CUTE CARD AND TREAT BOX WITH A DANCING GNOME using the STORY BOOK SUITE


The gnomes in the STORY BOOK SUITES are adorable.  But dancing gnomes are paper crafting genius.  The amazing idea came from Susan Campfield, a fellow Stampin' Up demonstrator and shared with me by a team member.  After watching her video I had to give it a try.  I used the KINDEST GNOMES bundle and the suite's DSP.  The dies in this bundle create an adorable gnome with no stamping or coloring.


To make the gnome, I used BASIC WHITE card stock to make the beard, BASIC BLACK for the feet and BLUSHING BRIDE for the nose.  For the hat, I chose a piece of the coordinating DSP. for this card a snowflake design. The special die cut that creates the "dancing feet" is from the SWEET CANDY CANES bundle. It's the die intended for making the candy cane holder.


For the card, start with a piece of SOFT SUEDE card stock cut at 4-1/4in by 11in and scored at 5-1/2in on the LONG SIDE.  Adhere to the card front a piece of the coordinating DSP measuring 4in by 5-1/4in. In the center of the card front, layer a POOL PARTY card stock measuring 2-1/4in by 4in.

To create the dancing legs, cut the candy cane holder die out of BASIC WHITE card stock.  Cut down the edges so they are even with the holes, approximately 3/8in.  Then cut the piece in half.  You can use the other for our next project.  Adhere this piece to the top of the legs.

Arrange the gnome on the front of the card.  Remove all but the legs and adhere the legs using a MINI DIMENSIONAL in the hole.  Add the rest of the gnome using DIMENSIONALS.  

Add the sentiment using a 5/8in strip of BASIC WHITE card stock, stamping with BALMY BLUE INK.  Adhere to the top of the card front with DIMENSIONALS.

Using this same fun design, I created a TREAT BOX, changing the gnome to a Santa and adding a delicious LITTLE DEBBIE'S BIG CHRISTMAS TREE CAKE.


To create the box, start with a piece of GARDEN GREEN card stock cut at 7-1/2in by 10-1/2in.  On the SHORT side, score at 1/2in, 2in, 6in.  On the LONG side, score at 1/2in, 2in, 5-1/2in and 7in. Below is the box after the card stock is scored, creased and excess paper is cut away.


Before assembling the box, adhere two DSP panels on the front and back, measuring 3-3/8in by 3-7/8in. For my box, I used DSP from the SWEET CANDY CANES SUITE. At the top of the front panel, punch out a thumb notch using a 3/4in CIRCLE PUNCH.  Assemble using TOMBOW.  

For the embellishments on the front, start with a piece of POOL PARTY card stock measuring 2-1/4in by 3-1/2in and adhere it. The gnome I created was similar to the one on my card above.  The only difference was that I cut out two hat die cuts, one in CHERRY COBBLER card stock and one in BASIC WHITE. I trimmed the BASIC WHITE piece to create the fur for the hat.  Adhere the gnome in the center of the front panel of the box.  

Punch a BASIC WHITE circle using a 1-3/8in CIRCLE PUNCH and stamp the sentiment using GARDEN GREEN INK.  Adhere it to the top right using DIMENSIONALS.  Finally, add a GARDEN GREEN bow from the REAL RED & GARDEN GREEN RIBBON COMBO PACK using a GLUE DOT.

Click on the link below to see how both of the projects came together.


Click on the link below for a downloadable PDF of these projects.


All the products used for these projects are available in my online store.  Click below and start shopping.


Thanks as always for visiting my blog.  I hope you feel inspired to try to make something creative on your own.

Keep Stamping,

Barb Reed
The Wexford Stamper


Wednesday, October 19, 2022

CREATE AN AMAZING POP UP CARD USING THE STORYBOOK GNOMES SUITE


Who doesn't love a cute gnome? The STORYBOOK GNOME SUITE in the new mini catalog is an adorable set of products.  The KINDEST GNOMES BUNDLE has adorable gnome images and coordinating dies.


As with many of the suites, the Designer Series Paper is the star.  The adorable images and the ability to cut them out using the suite's dies makes them just perfect.


The design of this POP UP CARD is very simple and can be used with any suite.

Start with a piece of SOFT SUEDE cut at 4-1/4in by 11in, scored at 5-1/2in for the card base.  Next, adhere a 4in by 5-1/4in piece of DSP on the card front and the inside of the card directly behind the card front. Then place a 4in by 5-1/4in piece of BASIC WHITE card stock on the other side inside the card.

Next, let's create the pop ups.  For the larger pop up, cut a piece of SOFT SUEDE at 3-3/4in by 5in. Score on the LONG SIDE at 1in, 2in, 3in, 4in.  Crease and fold into a rectangular prism.  For the smaller pop up, cut a second piece of SOFT SUEDE at 2in by 3-1/2in.  Score on the LONG SIDE at 1/2in, 1-1/2in, 2in, 3in.  Crease and fold into a smaller rectangular prism.  Attach the larger to the inside hinge first, then the smaller above to the left.

Finally, cut a piece of WHITE GLIMMER PAPER at 3/4in by 3-3/4in and cut a hill of snow using a PAPER SNIPS.  Adhere it to the front side of the large pop up using TOMBOW ADHESIVE.  Place the two gnome and mushroom house images on the card as shown using DIMENSIONALS.

For the sentiment on the outside of the card, use a 5/8in strip of BASIC WHITE card stock and stamp in BALMY BLUE ink.  Adhere the strip on a 3/4in strip of WHITE GLIMMER PAPER and trip around the banner flag.  Adhere to the front of the card using DIMENSIONALS.  

Click on the video below to see how the card comes together.


If you'd like a downloadable PDF for this project, click below.


All the products used in this project are available in my online store.  Just check it out below.


Thanks for stopping by my blog.  I hope you are feeling inspired to try one yourself.  Stop by again to check out more projects as we approach the holiday season.

Keep Stamping,

Barb Reed

The Wexford Stamper


Wednesday, October 12, 2022

AN ADORABLE HAND SANTIZER HOLDER USING THE STORYBOOK GNOMES SUITE


Need a quick and cute gift for the holiday season?  Check out this adorable HAND SANITIZER HOLDER.  This project is made using products from the STORYBOOK GNOMES SUITE. The KINDEST GNOMES BUNDLE includes these adorable gnome images, along with a cute mushroom house and useful sentiments.


But the star of this show is the amazing STORYBOOK GNOMES DESIGNER SERIES PAPER.


The images and the color palate of this DSP stack makes adorable projects for those gnome lovers in your life. This project is tied up using the pretty BALMY BLUE and WHITE RIBBON.


Click on the video below to see how this project comes together.


The link below is a DOWNLOADABLE PDF for this project.


To purchase any of the products used for this project, click on the link below to shop in my online store.


Thanks for coming by my blog.  I got one more fun project using the STORYBOOK GNOMES SUITE to share next week.  Come back.

Keep Stamping,

Barb Reed
The Wexford Stamper.


Tuesday, September 20, 2022

TEN DAYS OF HALLOWEEN- DAY 8 GHIRARDELLI SQUARES TREAT BOX


It's DAY 8 of my TEN DAYS OF HALLOWEEN SERIES and I'm changing things up a bit.  I'm adding a little PUNCH ART to make a cute fall treat.  The treat in this box is a new fall favorite for me.  MILK CHOCOLATE CARAMEL APPLE SQUARES. Yummy!!  These treats are easy to find at any grocery store.


For this project, I used the GINGHAM COTTAGE DSP PACK and a sentiment from the SCARY CUTE STAMP SET.


To create the box, start with a piece of the GINGHAM COTTAGE DSP, cut at 6-3/4in by 4-1/2in.  The template below shows how the treat box should look after folding, creasing and cutting away the excess DSP.


Before putting the box together, create a thumb notch on one short end.  This will be your lid.  Apply TOMBOW to all of the flaps and adhere them to the side panels.

For the embellishments on top, punch out three CALYPSO CORAL ovals using the DOUBLE OVAL PUNCH.  This is such a great punch to have in your stash.


Using the CALYSO CORAL INK PAD, dab some ink on the edges of all three ovals.  Then using TOMBOW, glue them together as shown above.  For the stem, cut a small triangle out of PARAKEET PARTY CARDSTOCK and attach it to the top of the center oval.  Place the pumpkin on the top of the box using DIMENSIONALS.

For the sentiment, cut a 3/4in strip of BASIC WHITE CARDSTOCK and stamp the TRICK OR TREAT sentiment using BLACK MEMENTO INK.  Flag the right end and place it on the lid as shown using DIMENSIONALS.  Finally, using the LINEN THREAD, tie a double bow and place it on the box under the sentiment strip using a GLUE DOT. 

To see how the treat box comes together, click on the video below.


If you'd like a downloadable PDF for this project, click here.


All the products used for this project are available in my online store.  Check it out here.


Thanks for stopping by my blog.  I have two more Halloween projects to share.  Hope you are feeling inspired to create something yourself.

Keep Stamping,

Barb Reed
The Wexford Stamper


Thursday, September 15, 2022

TEN DAYS OF HALLOWEEN- DAY 7 CHOCOLATE CEREAL BAR TREAT BOX


It's DAY 7 of my TEN DAYS OF HALLOWEEN SERIES and this project is a fun little treat box for a chocolate cereal bar.  I used the COUNT CHOCULA MINI TREATS but you can use this box for many different sweets.  

I chose the same products for all my projects.  They are shown here.  GINGHAM COTTAGE DSP and the SCARY CUTE STAMP SET.  I have used different ribbon but I always encourage you to see what you have in your stash.


To create this treat box, start with a piece of PARAKEET PARTY CARDSTOCK measuring 4-3/4in by 5in.  On the LONG SIDE, score at 1/2in, 1-1/4in, 2-3/4in and 3-1/2in.  On the SHORT SIDE, score at 3/4in.  The template below shows how the treat box should look after scoring, creasing and cutting away excess card stock.


Before assembling the box, add DSP to the front panel measuring 1-3/8in by 3-7/8in.  Then using a 1-3/8in CIRCLE PUNCH punch a semicircle out of the top of that panel.  This is not required but it allows the recipient to get a peek at the treat and to be better able to reach in to pull it out.

Assemble the box by placing TOMBOW on the 1/2in panel and pressing it to the other end of the bow.  Fold up the bottom flaps and glue in place.

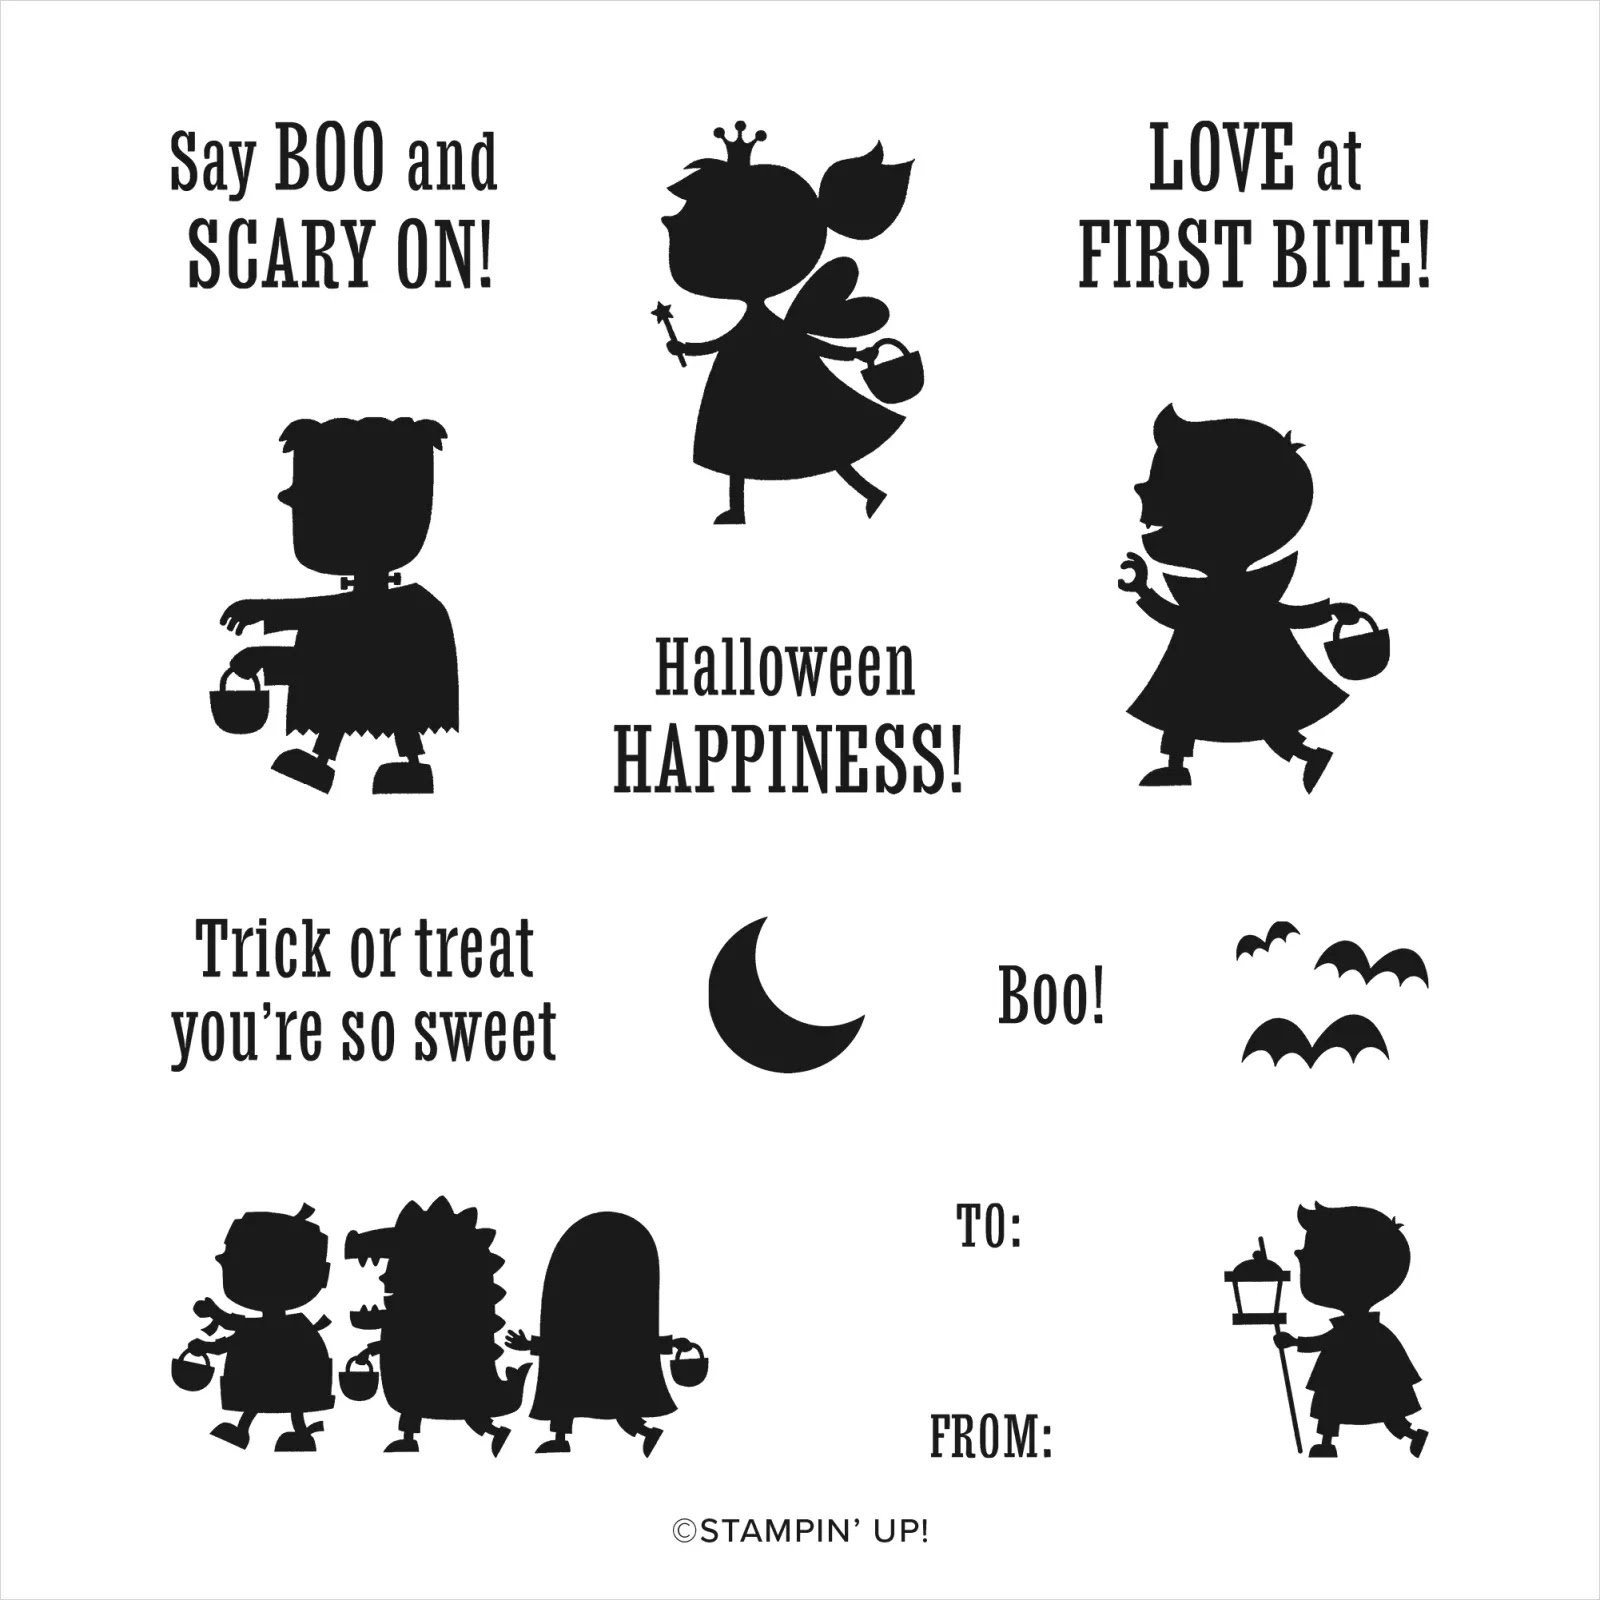
For the embellishment, start with a 2in BASIC WHITE circle cut using a punch or the LAYERED CIRCLE DIES.  On the circle, stamp the Dracula silhouette in PARAKEET PARTY INK and stamp the SAY BOO AND SCARY ON! sentiment on top using BLACK MEMENTO INK.  Punch a hole in the top, creating a tag and tie it to the box using PARAKEET PARTY METALLIC WOVEN RIBBON.  The video below shows how this box comes together.


If you'd like a downloadable PDF for this project, click below.


All the products used for this project are available in my online store. Just click below.


Well, DAY 7 is in the books.  Come back soon for three more Halloween projects you will love.

Keep Stamping,

Barb Reed
The Wexford Stamper


Wednesday, September 14, 2022

TEN DAYS OF HALLOWEEN- DAY 6 FRAGRANCE SPRAY GIFT BOX


It's DAY 6 of my series and today I will be sharing a non edible treat.  Besides being an avid paper crafter, I am also an avid BATH & BODYWORKS shopper.  I love all the yummy fragrances and they always have fun seasonal choices.  The fragrance I chose was MARSHMALLOW PUMPKIN LATTE.  

The products I used for this project are the same products used for all the projects in the series.  I used the GINGHAM COTTAGE DSP and the SCARY CUTE STAMP SET.  Both shown below.


To create this gift box, start with a piece of CALYPSO CORAL CARD STOCK cut at 9-5/8in by 7in.  On the LONG SIDE, score at 1-1/4in 2-1/2in and 8in.  On the SHORT SIDE, score at 1-5/8in, 3-1/4in, 4-7/8in and 6-1/2in.  The template below shows how the cardstock will look after it's creased and excess cardstock is cut away.


Before assembling your box, adhere 4 pieces of DSP to the large panels, measuring 5-1/4in by 1-3/8in.  Two pieces of DSP for the closure at the top measure 1-3/8in by 1-1/8in. Lastly, using a corner rounding tool, round the remaining corners on the closure flaps.

Adhere the box together by placing TOMBOW on the 1/2in panel. Glue the bottom flaps and close the bottom of the box. 

For the embellishments on the front of the box, I used a die from the TAILOR MADE TAGS DIES and BASIC WHITE CARDSTOCK.  On that tag, stamp the moon image using DAFFODIL DELIGHT INK and the BOO! sentiment in BLACK MEMENTO INK.  On a scrap piece of BASIC WHITE, stamp the cut little Frankenstein image and "fussy cut" using your PAPER SNIPS. Add the die to the front of the box with TOMBOW and the Frankenstein with DIMENSIONALS.

On a scrap piece of CALYPSO CORAL CARDSTOCK, stamp the TRICK OR TREAT, YOU'RE SO SWEET sentiment, cutting out only the first three words. With DIMENSIONALS, adhere this to the bottom of the box as shown.

Slide your Fragrance Mist into the box and pinch together the closure.  Using a paper punch, punch two holes side by side on these panels.  Thread a piece of BLACK & WHITE GINGHAM RIBBON through the holes and tie a bow.

Click on the link below to see how the box comes together.


If you would like a PDF Tutorial for this project, click below.


All the products used for this project are available in my online store.


Come back soon to see DAY 7's creation.  

Keep Stamping,

Barb Reed
The Wexford Stamper


Monday, September 12, 2022

TEN DAYS OF HALLOWEEN- DAY 5 HERSHEY BAR TREAT BOX


I remember as a kid going trick or treating in my neighborhood with my brothers.  We lived in a large housing development so we could wrangle up lots of candy in a very short time.  Every year, however, we made a point to go to one particular house.  This house gave out FULL SIZE HERSHEY BARS and that was an amazing treat for any trick or treater.  Today I'm going to share a quick and easy HERSHEY BAR TREAT BOX.

I will be using some of my favorite products from the JUNE-DEC MINI CATALOG. The DSP is from the GINGHAM COTTAGE PAPER STACK and comes with 48 sheets and colors that can be used for many seasons and holidays to come.


This adorable SCARY CUTE STAMP SET has so many great images and sentiments for HALLOWEEN.


To create this treat box, cut a piece of GORGEOUS GRAPE CARD STOCK at 6-1/2in by 5-5/8in.  On the LONG SIDE score at 3/8in and 6-1/8in.  On the SHORT SIDE, score at 3/8in, 2-5/8in, 3in and 5-1/4in.  The template below shows how the box looks after creasing the score lines and cutting away the excess card stock.


Before assembling the box, adhere a piece of the DSP measuring 5-5/8in by 2-1/8in to the top flap.  Notch the front edge of the box using the 1in CIRCLE PUNCH.  Place TOMBOW on all the tabs and put the box together.  

For the embellishments on the box, cut out a rectangle measuring 2-3/8in by 1in from the STITCHED RECTANGLES DIES.  Stamp using GORGEOUS GRAPE INK, the trick or treaters image (stamp off first before stamping on the rectangle).  Then stamp your sentiment on top using BLACK MEMENTO INK. Adhere it to the bottom right hand corner using DIMENSIONALS.  

Add a ribbon if you like.  I used a piece of CALYPSO CORAL SEAM BINDING but the BLACK & WHITE GINGHAM RIBBON is another great choice.

The video below shows how the box comes together.


If you'd like a downloadable PDF for this project, click below.


The products used for this project are available in my online store,  just click below and start shopping.


Thanks for coming by during my TEN DAYS OF HALLOWEEN SERIES.  We are half way through so come back soon to check out more project ideas.

Keep Stamping,

Barb Reed
The Wexford Stamper