Showing posts with label 3D projects. Show all posts

Monday, October 16, 2023

MONDAY FUN DAY with The Wexford Stamper- Let's make some quick cards using scraps and Stampin Up Adhesive Sheets


Happy Monday Stampers!!! I have some fun projects for you today.  I've been cutting and prepping for my latest subscription card kits and I have a ton of scraps lying around.  This month, the kit used the JOY OF CHRISTMAS SUITE and scraps are from the amazing JOY OF CHRISTMAS DSP PACK.


The secret ingredient for these cards are the STAMPIN' UP ADHESIVE SHEETS.  They make the panels on the front of the cards so easy to make.


Before creating the projects, I put together all the front panels.  I start with a piece of card stock cut at 4in by 2-3/4in.  It really didn't matter what color the panel is, the scrap strips will cover it.  Next cut a similar size panel of an ADHESIVE SHEET.  Separate the layers and adhere the "sticky side" of the sheet on to the card stock panel.  Then peel off the backing, leaving the adhesive on the card stock.

Cut a number of 1/2in strips from the scraps of DSP.  For my projects, I created three different designs but the sky's the limit.  After placing the strips, cut away the excess DSP and layer it on a coordinating piece of card stock measuring 4-1/4in by 3in.


Once you finish the panels, you're almost done.  Choose another coordinating color card stock measuring 5-1/2in by 8-1/4in, scored at 4-1/4in for the card base.  Layer the panel in the center of the card front.

For the sentiment piece, use what you have.  I used punches I had in my stash, the 2in CIRCLE PUNCH and SCALLOP and the HANDMADE TAG.  For the sentiments, I used the BRIGHTEST GLOW STAMP SET.  This is a great set to have on hand for all your Christmas cards and projects.


To finish up the sentiment pieces, I added some greenery from the JOY OF NOEL DIES.  So quick and simple.  I just love this design.

If you know me well enough, you know that every post has to include a fun 3D project.  I used one of the panels created for the cards to make a cute little clam shell box.

Start with a piece of REAL RED card stock, measuring 7-1/4in by 11in.  On the SHORT side, score at 1in from both ends.  On the LONG side, score at 1in, 5in, 6in and 10in.  Fold and crease on all the score lines.  Cut on the score lines to create the six box tabs.  Apply TOMBOW to the tabs and fold the box together.  Add the scrap panel to the center of the box lid.  

Using a 3/4in BASIC WHITE card stock strip, stamp the sentiment using SHADED SPRUCE ink.  Attach to the box using DIMENSIONALS.

The video below shows how the card and box came together.  Just click.


All products used for these projects are available in my online store.  Just click below.

Thank you again for stopping by for my MONDAY FUN DAY projects.  Come back soon to see lots more holiday projects.  I hope I can inspire you to make something yourself.  

Keep Stampin'

Barb Reed
The Wexford Stamper


Wednesday, October 4, 2023

Create a HOLIDAY MEMORY BOOK, a GIFT BAG and TREAT BOX using the BEARY CHRISTMAS MEMORIES & MORE Products.


I've always loved the MEMORIES & MORE CARD PACKS and coordinating CARDS & ENVELOPES PACKS to make some quick and cute greeting cards.  The BEARY CHRISTMAS PACKS are no different.  But after an afternoon of creating last week, I found out that the packs make some really cool 3D projects as well.  I think my favorite is the HOLIDAY MEMORY BOOK.  The BEARY CHRISTMAS MEMORIES AND MORE PRODUCTS makes it easy to put it together.

To create the book itself, start with four envelopes.  Adhere them together using TOMBOW.  Place the adhesive on one envelope flap and line it up with another envelope's bottom edge.  Glue all four together.  Cut apart four card bases and adhere them to each panel of the book. Next, choose eight 4in by 6in cards and adhere them to the eight pages on the memory book.  On the inside pages, adhere four 3in by 4in cards layered with four 2-3/4in by 3-3/4in panels of BASIC WHITE card stock.  Using the sticker sheets from the kit, decorate around the picture panels.

For the cover, choose a 3in by 4in card and layer it on a 3-1/4in by 4-1/4in piece of NIGHT OF NAVY card stock.  Place this panel on the front of the book using DIMENSIONALS so a piece of the IRIDESCENT RIBBON can be used to tie the book closed.  Decorate with stickers.

If you want to add slider panels, I used NIGHT OF NAVY card stock cut at 4in by 5-1/2in and layer a 3in by 4in card and stickers.  These panels slide inside the envelope pockets and allow you to add more pictures or journaling.


With the extra envelopes in the pack, you can make adorable little gift bags.
First, using your paper trimmer, cut off the curved section of the flap to make it straight.  Next, on the three other sides, score at 3/4in and 1-1/2in.  Crease the score lines well then create the gift bag by pressing on the bottom edge of the envelope to form the bottom of the bag.  Squeeze the corners together to form triangles and adhere them to the bottom of the bag with TOMBOW.  

Crease the pleats on the sides of the gift bag and fold over the envelope flap.  Use some TOMBOW to hold the ends of the flap together.  Punch two holes in the flap and thread a piece of silver trim from the GOLD & SILVER TRIM COMBO PACK through the holes and tie on the front.  Finally, adhere a sticker from the BEARY CHRISTMAS MEMORIES & MORE PACK to the front of the bag.


For the gift box, start with a card base from the CARDS & ENVELOPE PACK.  On the LONG side, score at 1in, 2in, 4-1/4in, 5-1/4in and cut off at 7-1/2in.  On the SHORT side, score at 1in from each side.  Below is a template of the gift box after the excess card base is cut away.

Using the smaller 4in by 6in cards, cut a panel at 4in by 2in for the card front and two coordinating strips cut at 3/4in by 4in for the flap. Stick the LET IT SNOW sticker to a piece of scrap BASIC WHITE card stock and cut it out.  Punch a hole in the top and attach it to the gift box with the IRRIDESCENT RIBBON. Finally adhere the WARM WISHES sticker to the bottom right of the box front.

Remember, any other pieces you have left will be adorable holiday cards or gift tags.  I love these MEMORIE & MORE products.  So many possibilities.  If you'd like to see how these three projects come together, click the YOUTUBE link below.


For a downloadable PDF, click here. Please note the dimensions for the treat box are correct on the blog but may be incorrect on the PDF


To get the BEARY CHRISTMAS MEMORIES & MORE CARD PACK and CARD BASES & ENVELOPES, shop in my online store. The link is below.


Thank you for dropping by my blog.  Come back soon for some more holiday inspiration.

Keep Stampin

Barb Reed
The Wexford Stamper


Wednesday, September 27, 2023

DOUBLE GHIRARDELLI CHOCOLATE TREAT BOX & COORDINATING CARD featuring the JOY OF CHRISTMAS SUITE


Demonstrators with Stampin' Up are a little like Target.  We start sharing products for the holidays WAAAAAY too early.  Please understand, it's hard for us to wait because we are so excited about what's in the holiday.  We also want you to get started on projects early so you can have a stress-free holiday.  With that in mind, the projects shared in this blog post will featuring the amazing new JOY OF CHRISTMAS SUITE.  This thing is BIG.  So many products to share.


This suite has TWO BUNDLES.  The JOY OF NOEL BUNDLE and the CHRISTMAS CLASSICS BUNDLE offer a very traditional vibe with a beautiful color palate and festive images and sentiments.  


As always, Stampin' Up offers beautiful Designer Series Paper in this product suite.  The JOY OF CHRISTMAS DSP offers traditional images and colors while the JOYFUL SPECIALTY DSP add some shimmer with gold foiling.


Last but not least, the embellishments match perfect and add a great touch to all your products.  They include, BLACK & VERY VANILLA CHECK RIBBON and LOOSE HOLLY GEMS & SEQUINS. 


With all these amazing products, I had a hard time deciding what to use first.  After some thought and a serious sweet tooth, I created these projects.

For the DOUBLE GHIRARDELLI TREAT BOX, start with a piece of PECAN PIE card stock measuring 9in by 6-1/2in.  On the LONG side, score at 1-1/2in, 2-1/4in, 5-1/4 and 6in.  On the SHORT side, score at 3in and 6in.  The template below shows how your treat box will look after scoring, creasing and cutting away the excess card stock.


Hold the template in the portrait position, on the side with five panels, adhere three pieces of DSP to the three larger panels.  Two should measure 2-7/8in by 2-7/8in and one 2-7/8in by 1-3/8in.  On the bottom larger panel, add a craft magnet with a GLUE DOT before putting on the DSP.  Don't apply small one until later.

On the other side of the box, adhere two coordinating panels of DSP measuring 2-7/8in by 2-7/8in.  Using an oval punch, punch a half oval out of these panels on the outside edges.  Apply TOMBOW to the 1/2in panel, fold over and glue to inside of other panel to create two pockets.

Place the chocolate squares in the pockets and fold the box closed.  With the smaller top panel flap closed, add the second craft magnet, then the DSP. The box should stay closed with the magnetic closure you created.

For the embellishment, cut out a 2in BASIC WHITE circle with a CHERRY COBBLER coordinating scallop.  Die cut two pieces of greenery, one in SHADED SPRUCE and one in GRANNY APPLE GREEN.  Die cut three berries using CHERRY COBBLER.  Attach dies to the layered circles using TOMBOW.

Stamp the "Happy Holidays" sentiment on BASIC WHITE card stock and cut out RANSOM NOTE style.  Add to the circle as shown using DIMENSIONALS.  Add a BLACK AND WHITE GINGHAM RIBBON bow with a GLUE DOT.

For the card, start with a CHERRY COBBLER card base measuring 4-1/4in by 11in, scored at 5-1/2in on the LONG side.  Add a piece of the musical score foiled DSP measuring 4in by 5-1/4in to the card front. Using a piece of the wood foiled DSP, die cut the greenery square and the NOEL letters.  Add the greenery square to the card front as shown, adhere the NOEL letters to a CHERRY COBBLER card stock square die then add to the middle using DIMENSIONALS. 

Click on the link below to see how these projects came together.


If you'd like a downloadable PDF tutorial, click here.


All the products used in this blog post are available in my online store.  Just click here.


Come back and check my blog soon for some more fun holiday projects.  I hope you are feeling inspired to get crafty during this Christmas season.

Barb Reed
The Wexford Stamper


Monday, September 11, 2023

MERRY BOLD & BRIGHT SUITE- PROJECTS FROM CONNIE'S MINI CATALOG LAUNCH EVENT- 3D PROJECTS


On this blog post, I'm going to share the 3D projects I created for Connie's Mini Catalog launch.  If you know me you know I love to make boxes so I came up with quite a few. The first is a hand lotion gift box.  I typically use hand lotion from BATH & BODYWORKS. This box design is from a past project by Erica Cerwin of Pink Buckaroo Designs.  In the past, I've made a basic box to hold the hand cream tubes but this one is really a step up.


To create the box, cut three pieces of BLUEBERRY BUSHEL card stock.  For the body of the box, cut the panel at 2in by 10-1/2in. Score at 4-3/4in and 5-3/4in.  For the flap, cut at 2in by 3-5/8in.  Score on the LONG end at 1/2in and 1-1/2in. For the inside piece cut at 3-1/2in by 6in and score at 1in on all sides.

To create the exterior, adhere the flap at the top of the outside panel so it fold over to create the box.  The remaining panel will create the inside of the box where the lotion tube fits.  Before assembling it, punch a hole in either short end using the 3/4in CIRCLE PUNCH.  Cut out the tabs and assemble.  Remove the lid of the tube, put through the hole and replace the lid.  Adhere this interior piece on the inside of the exterior piece.

Before placing the DSP on the outside of the box add a magnet to the large folded panel using a MINI GLUE DOT.  Adhere a 1-7/8in by 4-1/2in piece of DSP.  Add a coordinating piece of DSP measuring 1-7/8in by 2in after placing the second magnet on the flap.  Add two assembled Christmas bulbs and IRIDESCENT RIBBON on the flap as shown.  Add sentiment at the bottom right of the box.

This next project uses these adorable tins that I purchased from Amazon.  Here's the link to this product.


For the belly band I cut a piece of DSP at 2-1/2in by 8-1/2in, wrapped it around the tin and secured it using TEAR N TAPE. For the embellishment, I punched out a 2in circle using BASIC WHITE card stock and a coordinating scallop using GRANNY APPLE GREEN card stock.  Add to the center of the front on belly band.  Add two lights using GRANNY APPLE GREEN and POPPY PARADE cards stock with BASIC BLACK SOCKETS.  Add to the front of the box as shown.  Tie a IRIDESCENT RIBBON bow and attach using MINI GLUE DOTS.  Stamp the sentiment on a 5/8in BASIC WHITE strip, flag the right end and add to the front as shown using TOMBOW.  

You can put lots of different things in this box. I wrapped five Hershey Nuggets and a lip balm with coordinating DSP and placed them inside. The next project is a mini gift bag.


Cut a 6in by 6in piece of DSP. Score on the FIRST side at 2in, 2-3/4in, 4-3/4in, 5-1/2in. Score on the other side at 3/4in, 4-1/2in. With the outside facing up, fold over the large panel to create the top of the bag.  Cut apart the tabs on the bottom and assemble the bag.  Tie the bag closed using the IRIDESCENT RIBBON.  Add your embellishments.  I stamped a POOL PARTY bulb on BASIC WHITE card stock and cut it out using the coordinating die.  I also cut out a BASIC BLACK socket die cut.  I then stamped MERRY & BRIGHT on BASIC WHITE card stock, fussy cut it and attached it to the bag as shown. 

The next gift box holds an Andes Creme De Menthe SNAP BAR, available at most grocery stores.


Start with a piece of GRANNY APPLE card stock cut at 9-1/4in by 5-1/4in.  Score on the LONG side at 3/4in, 1-1/2in and 8-1/2in.  On the SHORT side, score at 1/2in, 1-1/4in, 2-3/8in, and 4-1/8in.  Cut away excess card stock to close the bottom of the box and  create the flap on the top.  Add a piece of DSP measuring 7/8in by 6-1/4in to the front of the box.  

To create the embellishment, punch out a 2in BASIC WHITE circle and a GRANNY APPLE GREEN coordinating scallop.  Layer them together and stamp your sentiment in SHADED SPRUCE ink in the center-right of the circle.  Add a MELON MAMBO FOIL light bulb with a BASIC BLACK socket to the left side using DIMENSIONALS. Punch a hole in the top of the tag, thread through the IRIDESCENT RIBBON and tie it to the gift box.  Finish off with some IRIDESCENT SELF-ADHESIVE DISCS.

The next two projects are treat holders for FERRERO ROCHER CHOCOLATES, a great treat to gift for the holidays.  The first is a cute little carrier that I discovered on the PAPER PIXIE' S blog.  Click the link below to see here tutorial.


This treat holder is a cute EXPLOSION BOX I created to hold one Ferrero Rocher chocolate treat.


For the box, I cut a piece of POPPY PARADE card stock cut at 4-1/2in by 4-1/2in. Score at 1-1/2in on all four sides.  Add four more score lines starting at the outer most corners to the inner corner of the corner squares.  Crease and score those score lines to create the explosion box.  On the box, add four squares of DSP measuring 1-1/4in by 1-1/4in to cover the box panels.  For the lid, start with a piece of GRANNY APPLE GREEN card stock measuring 2-5/8in by 2-5/8in. Score at 1/2in on all four sides.  Cut away excess card stock to create the flaps and assemble the box lid.  Add a coordinating piece of DSP measuring 1-1/2in by 1-1/2in to the lid.   

For the embellishment, cut out a GRANNY APPLE GREEN FOIL light die cut and attach a SHADED SPRUCE card stock socket.  Tie a piece of IRIDESCENT RIBBON to the loop on the socket and add to the box using DIMENSIONALS. To allow more of the light to show, I stamped the sentiment on BASIC WHITE card stock and fussy cut around it before attaching to the box with TOMBOW.

My last two projects focus on gift giving with a great gift box and some cute gift tags. 


For the gift box, I used a 12in by 12in piece of cardboard from the DSP packaging. measuring 9-7/8in by 9-7/8in and scored at 2in on all four sides.  Fold and crease on the score lines. Cut away the excess card stock to create the four flaps for the box  Using TOMBOW, assemble the box.  

For the lid, cut a piece of SHADED SPRUCE card stock at 8in by 8in and score at 1in on all four sides.  Add a piece of DSP cut at 5-3/4in by 5-3/4in on the large middle panel.  Create the 3D Christmas lights by cutting two light bulb dies in each color. Cut of the bottom off one of the dies and score it down the center long wise.  Fold and adhere to the other die along the fold.  Add the SHADED SPRUCE sockets.  To add to the box, string them along a piece of IRIDESCENT RIBBON and tie a bow.

The last project is a quick way to create gift tags for the holidays.  The trick is how you die cut the bulbs.  Fold over a scrap piece of card stock.  Position the edge of the die so it is slightly off the paper on the fold side.  After you run it through the CUT & EMBOSS MACHINE, they will look like those in the pictures above. Add a socket and a piece of BAKER'S TWINE.

There you have it.  I hope my MERRY BOLD & BRIGHT projects inspire you to get started on your holiday projects.  If you have any questions about any of the projects, please email me at blreed@comcast.net.

Keep Stampin

Barb Reed
The Wexford Stamper


Wednesday, November 16, 2022

LET'S CREATE FOR CHRISTMAS- WEEK 1 SNOWFLAKE BROWNIE TREAT BOX


Christmas is on it's well.  This time of year is my favorite time to create gifts for friends and family.  For WEEK #1, I created this cute little treat box, the SNOWFLAKE BROWNIE TREAT BOX.  I used these yummy Little Debbie treats, available at any grocery store.

I used products from the beautiful LIGHTS AGLOW SUITE.  I used the snowflake die from the CHRISTMAS LIGHTS BUNDLE and the sentiment from the  BRIGHTEST GLOW stamp set


For DSP, I used the GARDEN GINGHAM paper pack, the same paper I used for my HALLOWEEN PROJECTS.  This pack is so versatile, I'm sure I'll be using it for SPRING PROJECTS as well.


For the treat box, start with a piece of MINT MACARON card stock measuring 6-1/8in by 6-3/8in.  On the LONG SIDE, score at 5/8in, 2-7/8in, 3-1/2in and 5-3/4in.  On the SHORT SIDE, score at 5/8in, 4-7/8in and 5-1/2in.  Below is a template of the box after the scored lines are creased and the excess paper is cut away.


Before assembling the box, place the two DSP panels measuring 4-1/8in by 2-1/8in and adhere them using TOMBOW.  

To decorate the box die cut a snowflake using WHITE GLIMMER PAPER.  Add it to the top of the box using DIMENSIONALS.  Stamp the sentiment on a scrap of MINT MACARON and punch it out using the 1-3/8in CIRCLE PUNCH. Place it on top of the snowflake using DIMENSIONALS.  Finally, I added a few pearls from the FESTIVE PEARLS PACK.

Below is a YOUTUBE video that shows how the box comes together.


If you'd like a downloadable PDF for this project, click below.


All the products used for this treat box are available in my online store.  Just click below.


Thanks again for stopping by my blog.  Come back soon.  I've got lots of holiday projects left to share.


Keep Stampin,

Barb Reed
The Wexford Stamper


Tuesday, August 2, 2022

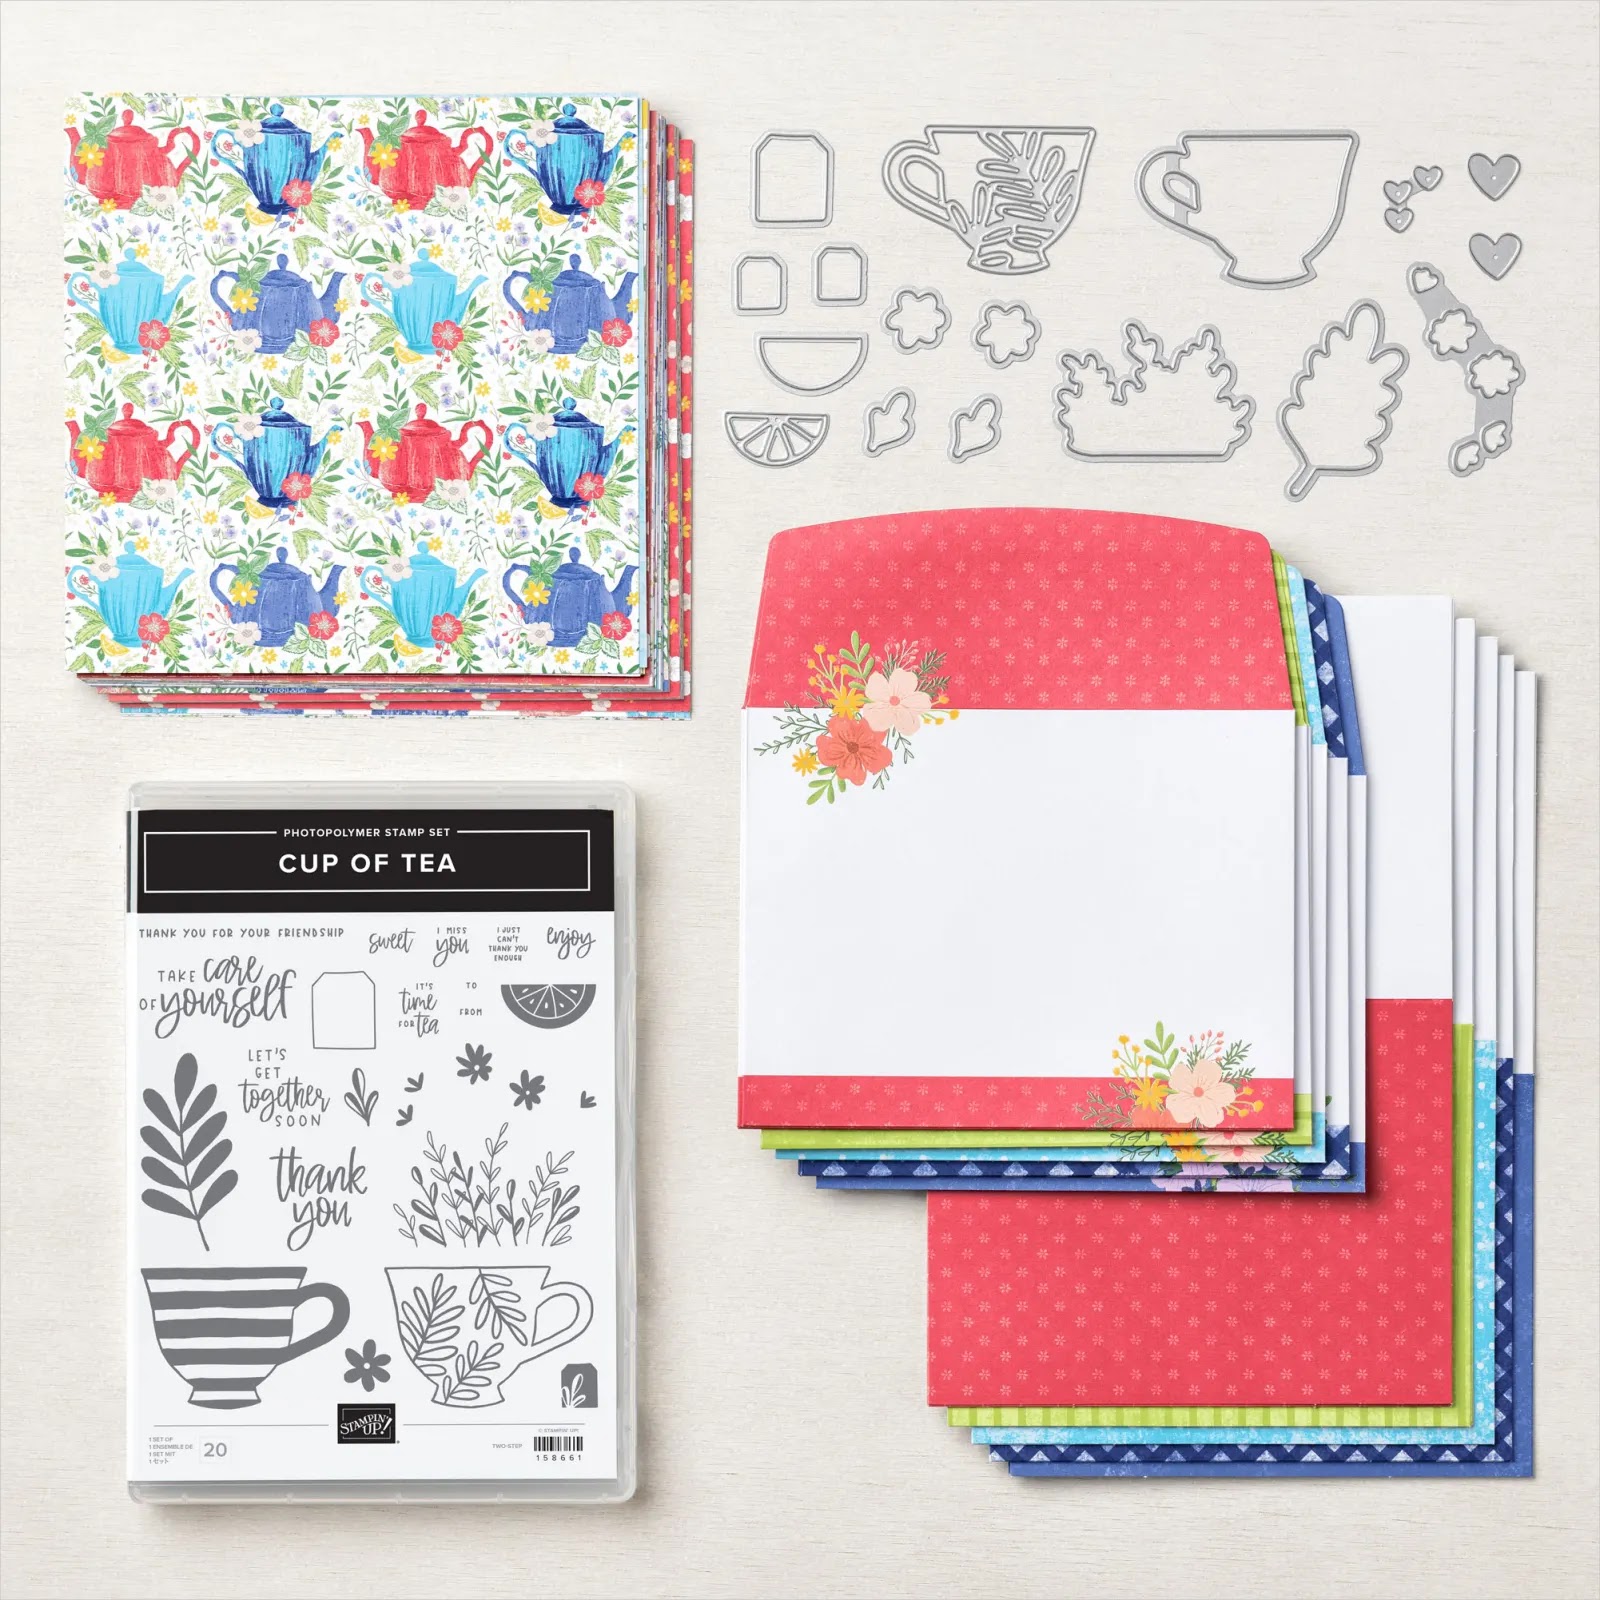
Create an ENVELOPE TREAT BAG featuring the TEA BOUTIQUE SUITE


Happy August!!  The summer is passing so quickly and my mind will be moving to the upcoming holidays.  Before that, I want to share some fun projects using the TEA BOUTIQUE SUITE.  This suite has so many amazing products.  I recently designed a card kit using them and my customers loved the fun folds they got to create.

With the products in this suite, it's so easy to create beautiful things.


For this project, I will be using the CUP OF TEA BUNDLE and the set of coordinating TEA BOUTIQUE CARDS & ENVELOPES.

To make the treat bag, choose one of the envelopes and place it on the SCORING BOARD. On all sides, except for the flap, score at 3/4in. Use your BONE FOLDER to crease these score lines. Your score lines will create 3/4in squares on the ends of the bottom side of the envelope.  Fold that small square in half on a diagonal, from the inside out and crease well.  Unfold and create a triangular fold that will make the bottom of the treat bag on both ends.  Adhere with TOMBOW.  Fold in the 3/4in edges of the flap and adhere them down as well.  You have now created your treat bag.

For the belly band, cut a piece of PARAKEET PARTY card stock at 10in by 2in.  Score on the LONG side at 1-1/4in, 5in, 8-3/4in.  Fold and crease the score lines. Wrap around the treat bag and secure the tabs underneath using TOMBOW.  

For the embellishment, use a BASIC WHITE 2-1/8in circle and a STARRY SKY coordinating scallop for the base.  For the tea cup, cut the cup using TAHITIAN TIDE card stock, the overlay using PARAKEET PARTY, the lemon using SO SAFFRON for the lemon and DAFFODIL DELIGHT for the detail piece.  The tea tag uses BASIC WHITE for the base and FLIRTY FLAMINGO for the heart.  Assemble the pieces and add the cup to the circle using DIMENSIONALS.  Adhere the tea tag to the right side of the cup and tuck the lemon behind the lip of the cup.

For the sentiment, stamp in STARRY SKY ink on a BASIC WHITE card stock 1/2in strip. Adhere to the front of the cut using TOMBOW.

These treat bags are quick and easy to make and you can use any envelope you have in your stash.  The video below shows how the treat bag comes together.

If you'd like a downloadable PDF for this project, click here.

PDF TUTORIAL

All the products used for this project can be purchased in my online store.  Just click below.

The Wexford Stamper's Online Store  

Thanks for dropping by my blog.  I'm back from summer break and ready to share some great project ideas going into the holiday season.  My next post will be another project using the TEA BOUTIQUE SUITE.  Come back soon.


Keep Stamping,

Barb Reed

The Wexford Stamper


Saturday, July 9, 2022

MAKE A BUTTERFLY TREAT BOX featuring the BUTTERFLY KISSES SUITE


Happy Fourth Stampers.  I'm writing this blog post on the morning of the fourth in total disbelief that it's July already.  Wow.  Where did June go?  Today's project again uses the BUTTERFLY KISSES SUITE with all its amazing products.  For the box, I used the BEST BUTTERFLY BUNDLE and BEST BUTTERFLY DSP.


To create the box, first cut a piece of coordinating card stock measuring 4-1/2in by 10-1/2in.  On the LONG SIDE score at 2-1/2in, 3-1/2in, 6-1/2in and 7-1/2in.  On the SHORT SIDE, score at 1in and 3-1/2in.  After folding on the score lines and cutting away the excess card stock, the box should look like the picture below.


Next, cut the DSP panels at 2-3/8in by 2-7/8in (2 panels) and 2-3/8in by 7/8in.  To create the stitched border on the box flap, place the triangular border die from the BASIC BORDERS DIES on the edge of the flap and run it through the CUT & EMBOSS MACHINE.  Place the DSP for the flap on the flap using POST-IT TAPE to cut the DSP as well.  Assemble the box by putting TOMBOW LIQUID ADHESIVE on the small tabs.

To include magnets, adhere one to the front panel of the box, using a GLUE DOT, just under the bottom edge of the flap.  Add the DSP to the front and back panel of the box with TOMBOW.  Put the flap down on the box front.  Add another magnet with a GLUE DOT where the two magnets come together.  Finally, adhere the flap DSP over the magnet.  These magnets are available on AMAZON at the link below.

For the embellishments on the front, stamp the upper striped wings, the lower triangle wings and the mini striped wings using PARAKEET PARTY INK. Stamp the large butterfly body using MEMENTO BLACK INK Cut out all images using the coordinating die cuts.  Glue the butterfly body parts together using TOMBOW and place it on the box flap using DIMENSIONALS.  Stamp the HEY sentiment using PARAKEET PARTY INK on BASIC WHITE card stock and punch out using a 1/2in CIRCLE PUNCH.  Adhere to the bottom right of the box using DIMENSIONALS.

To see how the project comes together, click on the YOUTUBE VIDEO below:


If you'd like a downloadable PDF tutorial, click here.


All the products used for this project are available in my online store.  Click here.


Thanks as always for stopping by my blog.  I have one more BUTTERFLY KISSES SUITE project to share next week.  Come back and check it out.

Keep Stampin'

Barb Reed
The Wexford Stamper