Showing posts with label 2020 January-June Mini Catalog. Show all posts

Tuesday, March 16, 2021

TEENY TINY TREAT BOXES featuring the SPRINGTIME JOY Stamp Set and the OVAL OCCASIONS Bundle


I think Spring is finally here in York PA.  We have had a nice string of beautiful days.  The daffodils are poking through and the birds are chirping way too early in the morning.  The projects on this post can be used for lots of occasions.  They would be great for Easter treats, spring birthdays, Mother's Day and even wedding or party favors.  

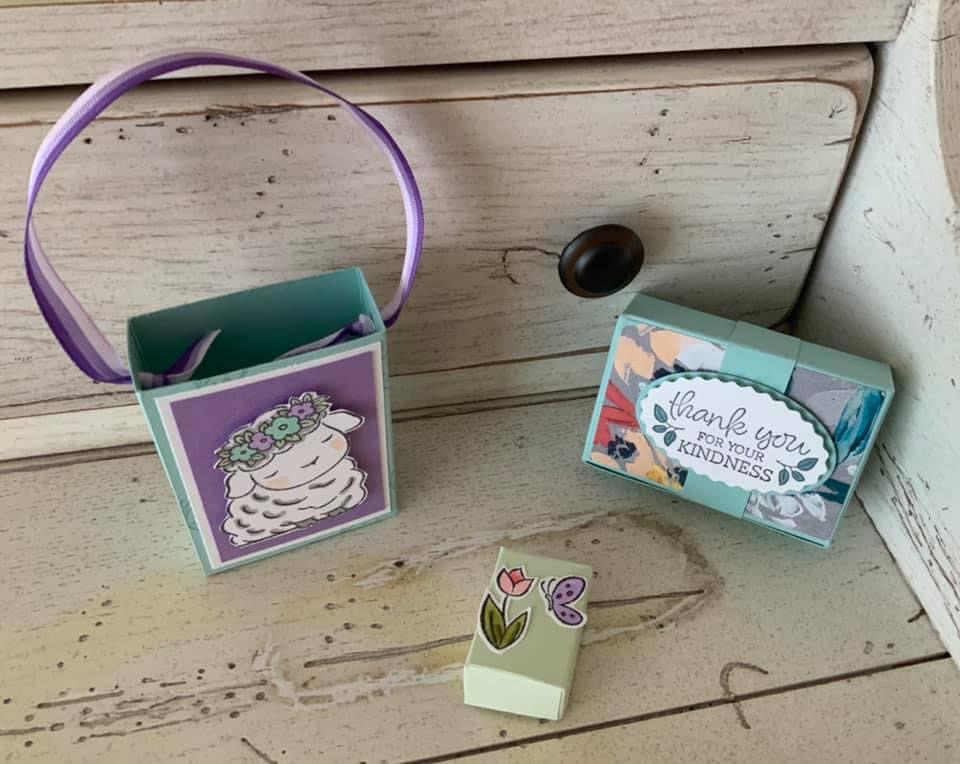
My first project is the Little Lamb Mini Gift Bag.  For the box, cut a piece of POOL PARTY card stock at 4in by 11in. Before scoring, randomly stamp the panel with the butterfly image from the SPRINGTIME JOY stamp set using POOL PARTY INK.  Then score on the LONG SIDE at 2-1/4in, 3-1/4in, 5-1/2in and 6-1/2in.  Score the SHORT SIDE at 1in. 

To make the front panel, cut a piece of BASIC WHITE card stock at 2-1/8in by 2-13/16in.  Layer on to that piece a piece of HIGHLAND HEATHER card stock cut at 1-7/8in by 2-5/8in.  On a scrap piece of BASIC WHITE, stamp the lamb image from the SPRINGTIME JOY stamp set in MEMENTO INK.  I used SMOKY SLATE, PETAL PINK, SOFT SEAFOAM, POOL PARTY and HIGHLAND HEATHER BLENDS.  I then “fussy cut” the lamb image and placed it on the mini treat bag using DIMENSIONALS.

On the back of the bag, I used a 2-3/4in by 1-5/8in size BASIC WHITE, scalloped, stitched rectangle from the STITCHED SO SWEETLY DIES. 


I stamped the sentiment at the top of the rectangle and stamped the flower images at the bottom.  I colored the flowers using HIGHLAND HEATHER, POOL PARTY and SOFT SEAFOAM BLENDS.  I then placed the rectangle on the back of the treat bag using DIMENSIONALS.  Finally, I punched holes in the sides of the box and tied a piece of TRICOLOR RIBBON for the handle. 

The second project is the Favor Box with a Belly Band.  I love this box because of its unique opening. 

Start with a piece of POOL PARTY card stock cut at 7in by 6-1/2in.  On the LONGSIDE, score at 2in and 5in.  Score at 1in, 3in, 4in and 6in on the SHORT SIDE.  With the 1in section at the top, score at 1-1/2in and 5-1/2in to the second score line.

After assembly, adhere a piece of FINE ARTS FLORAL DSP cut at 2-7/8in by 1-7/8in.  For the belly band stamp the sentiment on a scrap of BASIC WHITE card stock using a sentiment from the OVAL OCCASIONS stamp set.  

Using the DOUBLE OVAL PUNCH, punch out the sentiment using the scallop.  Using the second smallest oval in the STITCHED SHAPES DIES, cut out a POOL PARTY oval.  Layer those pieces using DIMENSIONALS.  Finally use a 3/4in strip of POOL PARTY card stock to make the belly band.

The last product is the teeniest.  This cute little treat box holds one pack of the MINI TIC TACS. 


I started with a piece of SOFT SEAFOAM card stock cut at 2-5/8in by 3-7/8in.  On the SHORT SIDE, score at 5/8in and 2in.  Score at 5/8in, 1-5/8in, 2-1/4in and 3-1/4in. Stamp the butterfly and the tulip image from the SPRINGTIME JOY stamp set on BASIC WHITE card stock with MEMENTO INK.  I colored the images with FLIRTY FLAMINGO, HIGHLAND HEATHER and OLD OLIVE BLENDS.  I “fussy cut” the images and adhered them to the front of the box using DIMENSIONALS.  The link below is where I got these cute little mini Tic Tac boxes

Mini Tic Tacs on Amazon

Below is the video tutorial that shows how these three boxes come together.


There you have it, THREE GREAT PROJECTS.  I hope you are inspired to try them yourself.  All the products used for these projects can be purchased in my online store.  Click below.

The Wexford Stamper's Online Store

I also created a downloadable PDF with all the pictures and dimensions, just for you.

PDF TUTORIAL

Thank you for dropping by my blog.  Next week I will be making a beautiful FUN FOLD EASTER CARD featuring the SPRINGTIME JOY stamp set and the HYDRANGEA HILL DSP.  Fun!!

Keep Stamping,

Barb Reed
The Wexford Stamper


Friday, August 7, 2020

CHOCOLATE because ADULTING IS HARD Chocolate Treat Box using the NOTHING'S BETTER THAN Bundle


Let's face it, adulting is hard.  For me, chocolate always helps.  This cute little chocolate treat box is so easy to make for a coworker or friend who needs a little something sweet at the end of a hard day.  As with my last posts projects, I used the NOTHING'S BETTER THAN Bundle from the Stampin' Up Annual Catalog.  This bundle has a retro style and allows for so much versatility.  


Tuesday, August 4, 2020

Christmas in July Continued. Two Simple Snowflake Cards using the SNOWFLAKE SPLENDOR SUITE


On my last blog post, I made two projects using the SNOWFLAKE SPLENDOR Suite. using primarily the die set.  I thought I'd  continue in the Christmas mood and bring you two simple and fun cards that use the beautiful snowflake images.  For the first, I used the beautiful palette that the suite's Designer Series Paper uses.  All those amazing blues like POOL PARTY, MISTY MOONLIGHT, PACIFIC POINT, BALMY BLUE and NIGHT OF NAVY were included as well as some HIGHLAND HEATHER INK.  In addition I used a "splatter technique" with my LIGHT NIGHT OF NAVY BLEND.   


For the second card, I went with a very different color combination.  The card base is CRUMB CAKE and a REAL RED panel is used between the card base and the embossed panel.  I chose three snowflake designs and randomly stamped them on the card front with VERSAMARK INK.  I then embossed using the WHITE EMBOSSING POWDER.  I also used some of the BLACK AND WHITE BAKER'S TWINE and the REAL RED TWINE to finish off the card.  Click on the video below to see how these two cards come together.


Thank you for stopping by my blog.  I hope you feel inspired to make some Christmas Cards yourself.  If you would like any of the products from these projects, you can purchase them in my online store. Click below.


For next week, I will be featuring the adorably retro bundle, NOTHING'S  BETTER THAN.  Come back next week for those posts.

Keep Stamping, 

Barb Reed
The Wexford Stamper


Tuesday, May 26, 2020

BEAUTIFUL FACETED BOX MADE USING THE PEACEFUL POPPIES SUITE


Less than two weeks left before the launch of the new catalog, so I thought it would be a great idea to use some of my favorite Designer Series Paper from the Mini Catalog for this project.  The PEACEFUL POPPIES SUITE was one of my favorite suites from the mini because of this paper.  The stamps and dies are amazing as well and thankfully many of these products will be transferring into the new Annual Catalog.  But I wanted to share my love of the poppy paper by making this cute FACETED GIFT BOX.


For the embellishment on the box, I used a label die from the suite.  I stamped the poppy image using MEMENTO INK and colored it using my POPPY PARADE BLENDS. before cutting it out using the dies.  I used the leaf die and cut out two leaves using MOSSY MEADOW CARD STOCK.


For the box, I started with a 9in by 8-1/2in piece of POPPY PARADE CARD STOCK. On the LONG SIDE, score at 1in, 1-1/4in,3in, 6in, 7-3/4in and 8in.  On the SHORT SIDE score at 1-1/2in, 4in,5-1/2in and 8in.  The DSP panels are cut at 2-1/4in by 1-1/2in (4 panels), 2-1/4in by 2-3/4in (2 panels) and 1-1/4in by 2-3/4in (2 panels).  The video below shows how the box comes together.


If you have any questions about this or any project on my blog, please don't hesitate to email me (blreed@comcast.net) or message me.  If you are interested in any of the products shown in my projects, you can go to my online store to purchase them.  Just click below.


Thanks again and Keep Stamping,
Barb Reed
The Wexford Stamper


Tuesday, May 19, 2020

Make a KIND BOX using the BEST DRESSED SUITE

In times like this, we could all use a little kindness.  I came up with this project while walking through my local SAMS CLUB with my husband.  Seeing everyone in masks is very anxiety provoking.  There is so much unknown in the world now that we need to be kind to each other and support those around us.  Then I saw a box of Mini Kind Bars and BOOM my idea was born.


The box started with a piece of PRETTY PEACOCK CARD STOCK measuring 7in by 6-1/2in.  On the LONG side, score at 1/2in, 1-1/2in, 5-1/2in and 6-1/2in.  On the SHORT side, score at 1in, 3in, 4in and 6in.  The BEST DRESSED DSP panels were cut at 1-7/8in by 3-7/8in, cut two of those. 


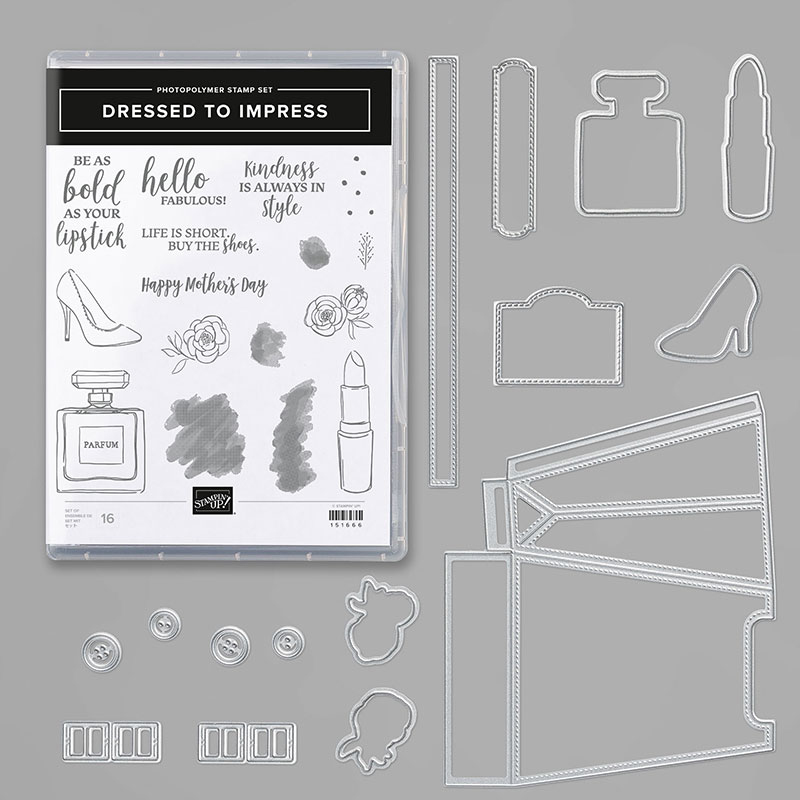
To embellish my box I used images, sentiments and dies from the DRESSED TO IMPRESS BUNDLE.


In the video tutorial below, I show how the project comes together.


If you have any questions about this or any project on my blog, please don't hesitate to email me (blreed@comcast.net) or message me.  If you are interested in any of the products shown in my projects, you can go to my online store to purchase them.  Just click below.


Thanks again and Keep Stamping,
Barb Reed
The Wexford Stamper