Showing posts with label craft fair item. Show all posts

Saturday, July 25, 2020

A Unicorn Treat Box and a Thank "Ewe" Card using the HIPPO HAPPINESS BUNDLE


This week's posts feature the adorable HIPPO HAPPINESS BUNDLE from the Annual Catalog.  This stamp set is so adorable, with unicorns, sheep, hippo and butterfly images to help you make whimsical cards and 3D items for family and friends. In addition to the images, you get a great set of dies with amazing label dies in three different unique designs.  They make the bundle so versatile.  I'm sure I will be using these labels for my holiday cards.  The project today is a favorite of mine, the Unicorn Treat Box.  I also made a cute Thank "Ewe" card. 


In addition to the featured bundle, I also used the bright and bold paper from the PLAYING WITH PATTERNS SUITE.  The color palate went beautifully with my creations.


To make the box, I started with a piece of MAGENTA MADNESS CARD STOCK cut at 7in by 5-1/2in.  On the LONG side, I scored at 1in, 5-1/2in, 6-1/2in.  On the SHORT side, I scored at 1in, 2-1/2in, 3-1/2in,, 5in,   The DSP panel used on the front of the box measures 1-3/8in by 4-3/8in.  In the video tutorial below, you can see how the project came together;  I also shared some tips on how to get a good image when you are doing two-step stamping.  


Check out my next blog post too. I'll be making two more projects with this bundle, this time featuring the happy little hippo.  Please comment and let me know what you think.  Thanks for stopping by.  If you have any questions about any of the creations on my blog, email me at blreed@comcast.net and I'll be glad to follow up with you.  If you are interested in any of the products shown in the videos, you can purchase them in my online store.  Click below.


Thanks for visiting my blog.  Please share with others you know who love some crafty inspiration.  Take care and keep stamping.


Barb Reed
The Wexford Stamper


Tuesday, July 7, 2020

Having Fun with some CUTE FRUIT


Have you seen the CUTE FRUIT STAMP SET?  It's adorable.  If you looked in the annual catalog, you'd never find it.  It's in this great new publication, called The Beginner's Brochure.  It's a small catalog that was created for beginning stampers or stampers just looking for a quick and easy project.


The images are so cute and fun and it's so easy to make a colorful, happy card.  The best part is that there are little faces that you can stamp on your fruit.  How else would they be so cute? They also sell the stamps as part of a set that also includes an acrylic block, Whisper White cardstock and an assortment of Classic Stampin' Spots.  A perfect set for a beginner to have great success with their very first project.


For my card, I pulled out many of my favorite BRIGHTS.  I used a GRANNY APPLE GREEN card base cut at 8-1/2in by 5-1/2in, scored at 4-1/4in.  I used a fun technique to make the panel on the front of the card.  I cut a piece of Whisper White at 3in by 4in. I then took an acrylic block just a bit larger than the panel and covered the face of it with GRANNY APPLE GREEN INK.  I then took a mister and sprayed water on the block to make some water droplets.  I then placed it down on the cardstock panel. I let it rest a minute until the panel was covered in ink. Then I dried it using my HEAT TOOL.  For the splatters, I used my GRANNY APPLE GREEN BLEND and flicked the ink using the cap on the brush tip side. I "roughed up" the edges a bit with my bone folder to give it more dimension.  Using TOMBOW, I adhered the panel to the front of my card as shown.  I then stamped the fruit and fussy cut them out with my PAPER SNIPS.  The colors I used were MAGENTA MADNESS and GRANNY APPLE GREEN for the watermelon, CRUSHED CURRY and GRANNY APPLE GREEN for the pineapple and DAFFODIL DELIGHT and SOFT SUEDE for the banana.  Don't forget the little smiley face using TUXEDO BLACK MEMENTO INK. For the sentiment, I used a strip of WHISPER WHITE cardstock cut at 3in by 1/4in.


For my 3D item, I made a cute little hand sanitizer box.  As you all know, hand sanitizer has become a hot commodity due to the pandemic.  For a while, I couldn't even find any.  Now that things have settled a bit, I was able to by some Watermelon Lemonade mini hand sanitizer from Bath and Body Works ONLINE. 

 
To start, you will need a piece of MELON MAMBO cardstock cut at 3-3/4in by 6in. On the LONG side, score at 1in, 2-3/4in, 3-3/4in and 5-1/2in.  On the SHORT side score at 1in. I then take my 2in CIRCLE PUNCH and cut a curved section out of the large panel that is between the two 1in-wide panels.  After trimming, your box should look like this template below.


To decorate the box, I took an 8in by 11-1/2in piece of WHISPER WHITE card stock and make my own "CUTE FRUIT DSP."  I used MELON MAMBO and GRANNY APPLE GREEN ink for the watermelons.  I used DAFFODIL DELIGHT and SOFT SUEDE for the bananas and lemons and CALYPSO CORAL for the oranges.  I stamped the SMILE sentiment using TUXEDO BLACK MEMENTO INK. I randomly stamped the images all over the cardstock.  It's really fun making your own designer series paper.  Here's what mine ended up looking like.  I cut the cardstock into 2in strips to use on my boxes.


After wrapping the 2in strip around the box, I finished the product with a 1in circle for a tag with the "you're one in a melon" sentiment in MELON MAMBO ink.  The tag was tied on using the POLKA DOT TULLE RIBBON.

The video tutorial below shows how the card and the box comes together.


Thanks as always for visiting my blog.  If you have any questions about the products or the tutorial, please email me at blreed@comcast.net.  

Happy Stamping,

Barb Reed 
The Wexford Stamper


Tuesday, May 19, 2020

Make a KIND BOX using the BEST DRESSED SUITE

In times like this, we could all use a little kindness.  I came up with this project while walking through my local SAMS CLUB with my husband.  Seeing everyone in masks is very anxiety provoking.  There is so much unknown in the world now that we need to be kind to each other and support those around us.  Then I saw a box of Mini Kind Bars and BOOM my idea was born.


The box started with a piece of PRETTY PEACOCK CARD STOCK measuring 7in by 6-1/2in.  On the LONG side, score at 1/2in, 1-1/2in, 5-1/2in and 6-1/2in.  On the SHORT side, score at 1in, 3in, 4in and 6in.  The BEST DRESSED DSP panels were cut at 1-7/8in by 3-7/8in, cut two of those. 


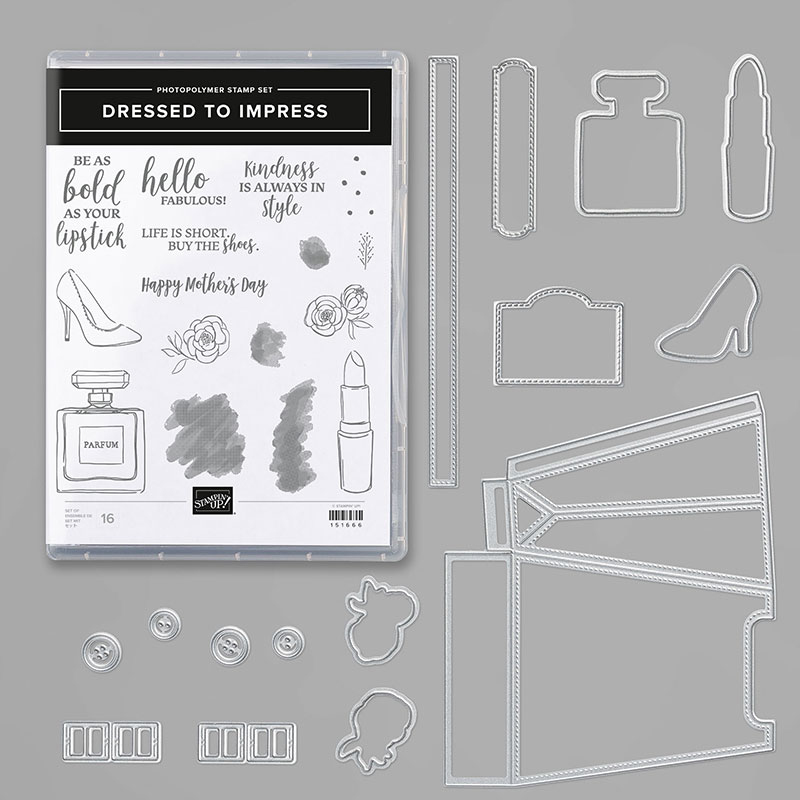
To embellish my box I used images, sentiments and dies from the DRESSED TO IMPRESS BUNDLE.


In the video tutorial below, I show how the project comes together.


If you have any questions about this or any project on my blog, please don't hesitate to email me (blreed@comcast.net) or message me.  If you are interested in any of the products shown in my projects, you can go to my online store to purchase them.  Just click below.


Thanks again and Keep Stamping,
Barb Reed
The Wexford Stamper


Thursday, May 14, 2020

Cute and Easy Post It Note Holder using DSP from the ORNATE GARDEN SUITE

Today's project uses paper from the lovely ORNATE GARDEN SUITE.  This is a nice gift for a coworker or friend or a great item for a vendor show.


The paper makes this project beautiful, add a daisy, uisng the MEDIUM DAISY PUNCH and you have a lovely gift.


Start with a piece of MINT MACARON CARD STOCK measuring 9in by 4-1/8in.  On the LONG side, score at 3-1/8in, 3-5/8in, 6-3/4in and 7-1/4in.  On the SHORT side, score 1/2in from both ends.  The ORNATE GARDEN DESIGNER SERIES PAPER panels you will need two measuring 2-7/8in by 2-7/8in and one cut at 2-7/8in by 1-1/2in.  The video below shows how this project comes together.


If you have any questions about this or any project on my blog, please don't hesitate to email me (blreed@comcast.net) or message me.  If you are interested in any of the products shown in my projects, you can go to my online store to purchase them.  Just click below.


Thanks again and Keep Stamping,
Barb Reed
The Wexford Stamper